A tree root invading your lawn can be a persistent and frustrating problem for homeowners. These roots can disrupt your garden, damage your lawn, and even pose a tripping hazard. If left unaddressed, they might lead to more severe issues, such as plumbing damage or weakened tree health. In this artical you will learn about How to remove tree roots from lawn?
Explanation of the problem: Tree roots in your lawn can be a nuisance.
The invasive nature: Discuss how tree roots naturally seek water and nutrients in the soil, often extending well beyond the tree’s canopy.
Common issues: Highlight the problems caused by tree roots in the lawn, such as uneven ground, dead patches of grass, or even structural damage to walkways and pipes.
Importance of removal
Discuss why it’s essential to remove tree roots.
Preserving your lawn: Emphasize the importance of maintaining a healthy, attractive lawn, which is often the pride of homeowners.
Preventing further damage: Explain that leaving tree roots in place can lead to more extensive and expensive problems down the road.
Safety concerns: Mention the safety aspect, as tripping hazards can be particularly dangerous, especially for children and the elderly.
Explain the structure: Give the reader an overview of what they can expect from the blog.
Tease the benefits: Mention that by following the steps outlined in the guide, readers will regain control of their lawn and prevent future root-related issues.
By the end of this guide, you’ll have the knowledge and confidence to tackle tree root removal in your lawn, ensuring that your outdoor space remains beautiful, safe, and free from disruptive root systems. Let’s get started with the first step: assessing the situation.
Certainly! Here’s a more detailed outline for Section II of your blog, titled “How to Remove a Tree Root from Your Lawn: A Step-by-Step Guide”:
Assessing the Situation
Before you start the process of removing a tree root from your lawn, it’s crucial to assess the situation thoroughly. This step will help you understand the extent of the problem and plan your root removal strategy accordingly.
Identifying the tree root: Explain how to locate and identify the root causing the issue.
Visual inspection: Encourage readers to visually examine the affected area of their lawn. Look for signs of root invasion, such as raised or cracked soil, unusual bumps, or an uneven lawn surface.
Follow the trail: If you’ve noticed problems in a particular area, try to trace the root back to the source tree. Look for any visible signs like protruding roots or a nearby tree trunk.
Use a metal probe: Suggest using a metal probe or a thin, long object to gently probe the soil in suspicious areas. A hollow sound or resistance could indicate the presence of a root.
Determine the root’s size: Assess the extent of the problem.
Digging test: Explain how to perform a simple digging test to estimate the depth and width of the root. Use a shovel or garden spade to carefully dig around the suspected root area.
Measure the root: If you’ve exposed the root, use a measuring tape or ruler to gauge its size. Note down the depth and width, as this information will be crucial for planning the removal process.
By identifying and assessing the tree root causing issues in your lawn, you’ll have a clearer picture of what you’re dealing with. This knowledge will help you choose the right tools and techniques for successful root removal, which we’ll cover in the subsequent sections of this guide.
Gathering the Necessary Tools and Materials
Before you start the process of removing a tree root from your lawn, it’s essential to gather all the tools and materials you’ll need. Being prepared will make the task more manageable and efficient.
List of tools: Provide a list of tools required for the task.
Shovel: A sturdy, sharp-edged shovel is essential for digging around the root and lifting it from the ground.
Garden Spade: A garden spade can be useful for precise digging and cutting around the root.
Root Saw: A root saw or pruning saw will help you cut through thick and stubborn roots.
Pruning Shears: Pruning shears are handy for cutting smaller roots and branches.
Mattock: A mattock is useful for breaking up compacted soil around the root.
Safety Gear: Safety goggles, gloves, and knee pads are crucial for protecting yourself during the process.
Measuring Tape: You’ll need a measuring tape or ruler to gauge the size of the root.
Wheelbarrow or Tarp: These items can be used to collect and transport soil, debris, and the removed root.
Safety Equipment: Safety goggles, ear protection, and gloves are essential for your protection.
Safety precautions
Explain safety measures to follow during the process.
Protective gear: Emphasize the importance of wearing safety goggles, gloves, and ear protection to safeguard against flying debris and loud noises.
Sturdy footwear: Encourage readers to wear sturdy, closed-toe shoes or boots with good traction to prevent slips and injuries.
Avoid power tools: If you’re using power tools, like a chainsaw, ensure you have the appropriate safety gear and are familiar with their operation.
Check for utility lines: Remind readers to call their local utility company to mark any underground utility lines before digging, to prevent accidents.
Work with a partner: If possible, advise having someone nearby for assistance or in case of emergencies.
By gathering the necessary tools and taking safety precautions, you’ll be well-prepared to tackle the root removal process effectively and safely. In the next section, we’ll delve into preparing the area for the actual root removal.
Preparing the Area
Before you can successfully remove a tree root from your lawn, it’s crucial to prepare the work area properly. This step will help ensure your safety and make the root removal process more manageable.
Clearing the workspace: Remove any obstacles or debris around the root.
Clear the area: Begin by removing any items, such as rocks, garden decorations, or debris, from the vicinity of the root. A clean workspace is safer and allows for better access to the root.
Trim vegetation: If there are plants or grass around the root, trim them back to create more working space. Be careful not to damage any nearby desirable plants.
Clear access paths: Ensure that you have clear pathways to and from the work area, especially if you’ll be using a wheelbarrow or tarp to transport soil and debris.
Marking the area: Indicate the root’s location for precision.
Use spray paint or flags: Mark the exact location of the root with spray paint or brightly colored flags. This will help you stay focused on the target area during the root removal process.
Measure and mark dimensions: If you have measured the root’s size during your assessment in Section II, mark the dimensions on the ground to guide your digging and cutting efforts.
By taking the time to clear the workspace and mark the root’s location, you’ll create an organized and safe environment for root removal. The next steps in this guide will involve digging and cutting around the root, so this preparation is crucial for a successful outcome. In the next section, we will delve into the actual steps for cutting and removing the root.
Cutting and Removing the Root
Now that you’ve assessed the situation and prepared the work area, it’s time to start the process of cutting and removing the tree root from your lawn. This section will guide you through the steps involved in this critical phase of the removal process.
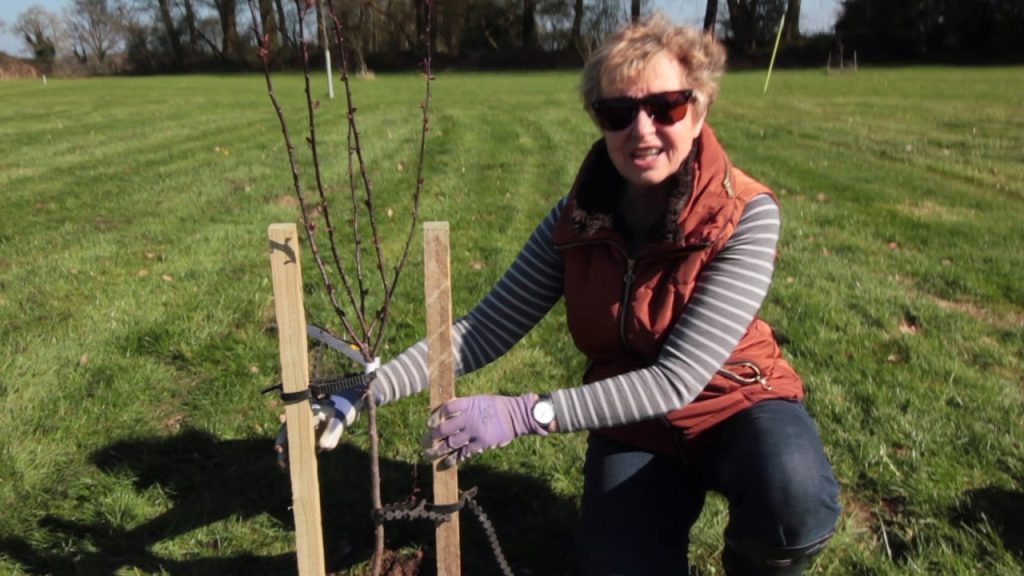
Pruning the tree
Safety first: Reiterate the importance of safety gear, especially if you need to use a ladder or climb the tree. If you’re not comfortable with tree pruning, consider hiring a professional arborist.
Identify connected branches: Examine the tree to identify any branches that are connected to the root you plan to remove. These may be sources of nourishment for the root.
Prune strategically: Use proper pruning techniques to remove the identified branches. Make clean, angled cuts to prevent injury to the tree.
Dispose of branches: Collect the pruned branches and dispose of them properly, either by mulching or in accordance with local regulations.
Digging around the root: Explain the process of digging carefully to access the root.
Repairing the Lawn
After successfully removing the tree root from your lawn, it’s important to take steps to repair the affected area and restore the health and appearance of your lawn. This section will guide you through the post-removal lawn repair process.
Filling the hole: Describe how to fill the hole left by the root’s removal.
Choose the right soil: Select a high-quality topsoil or garden soil mix that matches the composition of your existing lawn.
Level the ground: Fill the hole with the chosen soil, ensuring that it’s level with the surrounding lawn. Use a rake to distribute the soil evenly.
Tamp the soil: Gently compact the soil with a tamper or the back of a shovel to eliminate air pockets and create a stable surface.
Reseeding or patching: Explain the steps to restore the lawn’s appearance.
Select the right grass seed: Choose grass seed that matches the species of grass in your existing lawn. Look for a high-quality seed mix that’s appropriate for your climate.
Apply grass seed: Evenly spread the grass seed over the filled hole, following the recommended seeding rate on the seed packaging.
Cover with a thin layer of soil: Lightly cover the grass seed with a thin layer of soil or compost to protect it and promote germination.
Water thoroughly: Water the newly seeded area thoroughly, keeping the soil consistently moist until the grass establishes itself.
Monitor and care for new growth: Keep an eye on the seeded area, watering as needed and protecting it from heavy foot traffic until the new grass has grown sufficiently.
Related Posts:
Aftercare and Maintenance
After successfully removing a tree root from your lawn and implementing preventive measures, it’s crucial to maintain your lawn and keep it healthy. This section will provide essential aftercare and maintenance tips to ensure your lawn remains root-free and beautiful.
Watering and fertilizing: Explain how to care for the lawn after root removal.
Watering regimen: Advise on establishing a regular watering schedule to keep your lawn adequately hydrated. Consistent moisture helps the grass recover and grow.
Proper watering technique: Emphasize the importance of deep watering, which encourages grass roots to grow deeper and become more resilient.
Fertilization: Provide guidance on when and how to fertilize your lawn to promote healthy grass growth. Use a balanced fertilizer suitable for your grass type.
Avoid overwatering: Caution against overwatering, as it can create conditions conducive to shallow root growth and weed problems.
Conclusion
In this comprehensive guide, we’ve walked you through the process of removing a tree root from your lawn step by step. From assessing the situation to aftercare and maintenance, you now have the knowledge and tools to tackle this common homeowner challenge successfully. In this concluding section, we’ll recap the key takeaways and encourage you to take action for a healthy, root-free lawn.